Welcome to the second episode of the Time Of Conundrum Lessons serie! Today’ll teach you how to take screenshots while using your Samsung Gear VR!
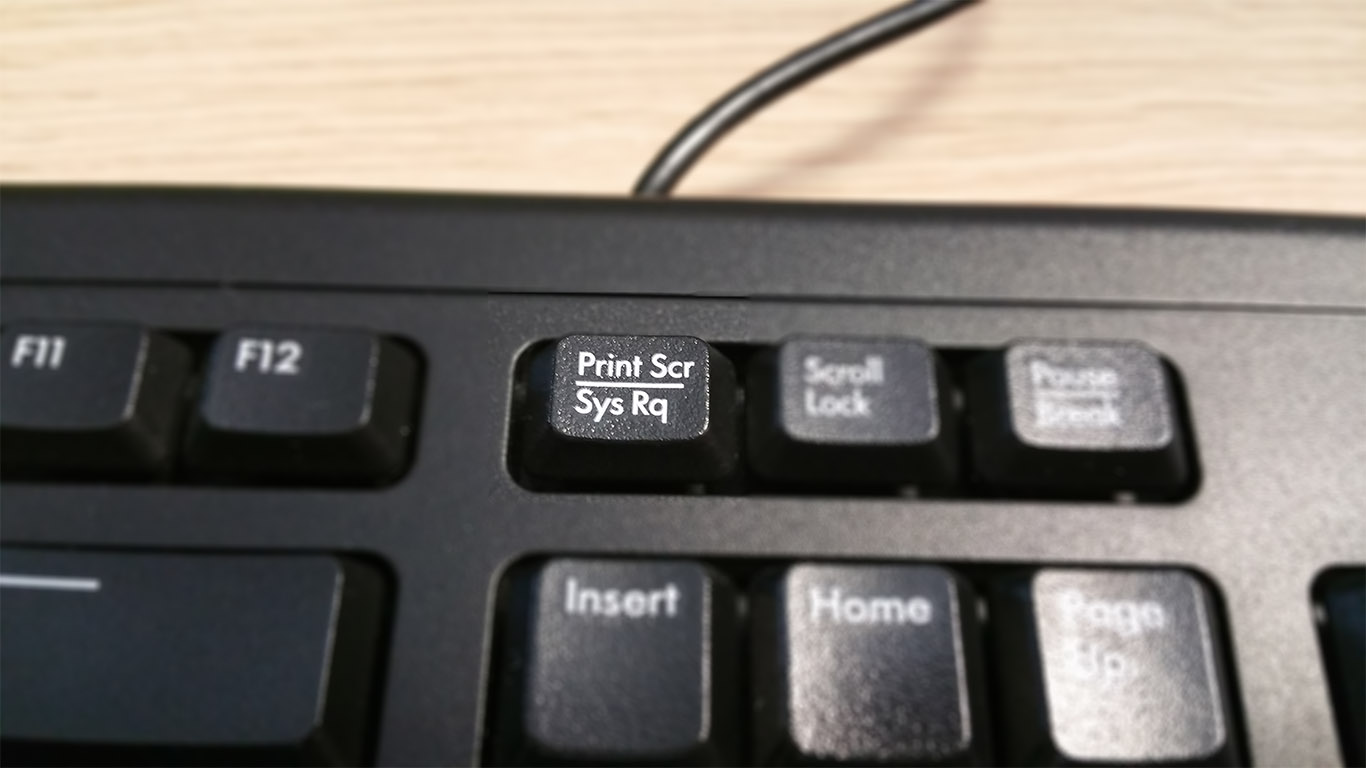
Well, if you have a Samsung S6, you can use this trick and use essentially a Bluetooth or USB keyboard connected to your Gear VR and then press the "Print" key to make a screenshot and save it to the camera roll. But… if you, like me, have a Samsung Note 4? Or you don’t want to use a physical keyboard? Well, things become a little more nerdy… and you have to use adb inside the command line prompt. Ready for the nerdiness? OK, let’s go!
Open a command line, and instruct adb to connect over WiFi (obviously you need a common WiFi network between the PC and the smartphone). Notice: in the following commands I’ll assume you have added adb tool directory to your system PATH environment variable… if this is not your case, add it immediately (adb.exe is in the folder <android_sdk_path>\platform-tools)
Plug your smartphone to USB port of PC, then type:
C:\> adb tcpip 5555
to instruct adb to connect over TCP/IP (and not over USB) using port 5555. You can change the port number, if you wish, but this is tipically unused. After having written this line, unplug your smartphone and then type:
C:\> adb connect <ip_address_of_your_phone>
(e.g. adb connect 192.168.202.83, if this is the address of your phone over the WiFi network)

Now your smartphone is connected to you PC over WiFi, so you can take a screenshot of your phone at every time writing this weird line:
C:\> adb shell screencap -p /sdcard/<temp_image_name> && adb pull /sdcard/<temp_image_name> <image_name_on_pc> && adb shell rm /sdcard/<temp_image_name>
Here, <temp_image_name> represents a temporary image name, like output.png (this image will be stored and deleted on the phone, so its name is not really important); while <image_name_on_pc> instead is the full path of the screenshot image you want to store on the PC.
So, an example of this command is the following:
C:\ >adb shell screencap -p /sdcard/output.png && adb pull /sdcard/output.png D:\myScreenshot.png && adb shell rm /sdcard/output.png.
But… what actually does this long line command do? It is actually a compound of three commands:
- The first one gets the actual screenshot and saves it inside the file specified inside the SD card of your phone
- The second one copies this image from the SD card to your PC hard-drive
- The third one deletes the temporary image created by the first command
Ok, that’s all: now you can play your favourite game on the Gear VR, then execute this line on the command line to grab a fantastic screenshot like this one:
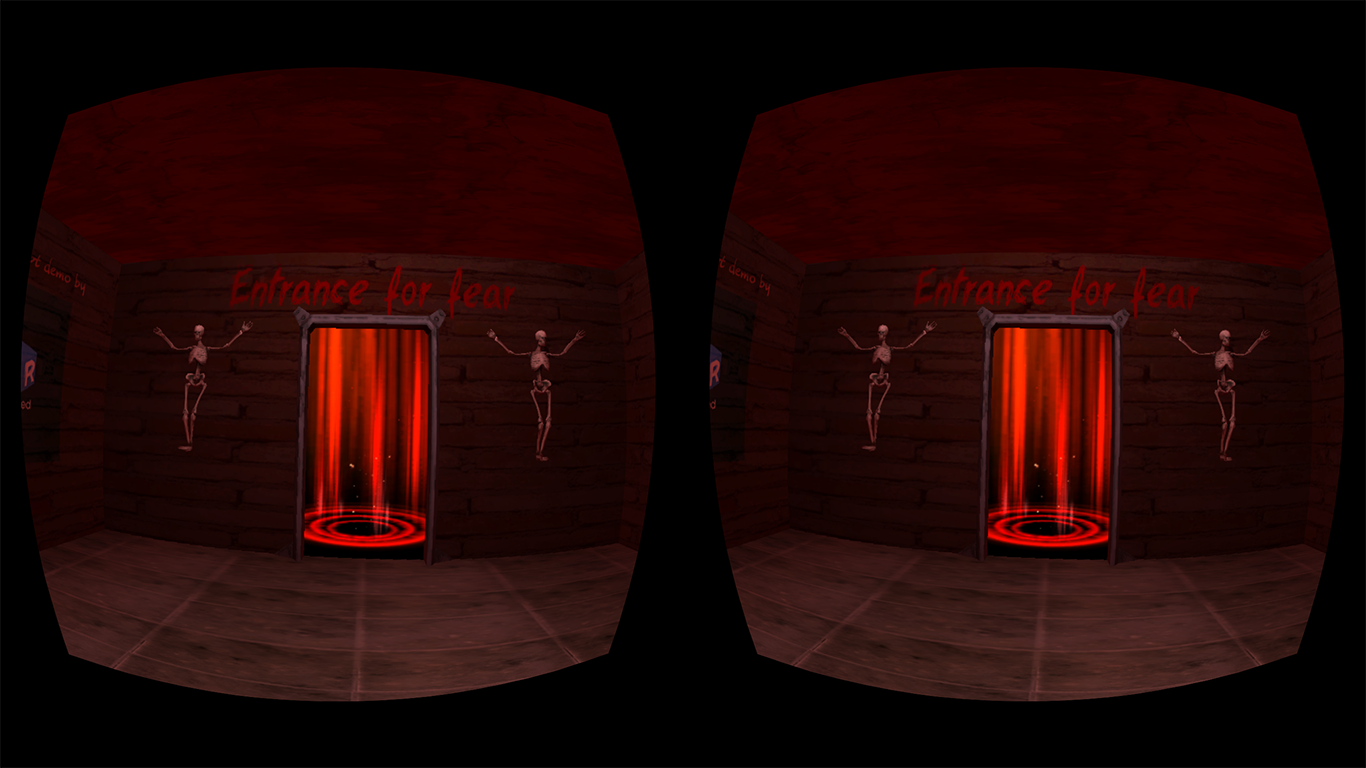
Pretty cool, isn’t it?
I’ve discovered this method using these sources: https://www.learn2crack.com/2014/08/capture-screenshot-record-screen-using-adb.html, http://stackoverflow.com/questions/29573291/capture-android-device-screenshot-with-adb-perl. Hope you liked it… if you know alternative methods, let us know in the comments!
If you liked this tutorial, please consider supporting us in any ways, like having a look at our ImmotionRoom system videos, subscribing to our newsletter or sharing this article on the social networks!
Have a nice screenshot day!